Closet Wallpaper and Wall Murals


How to Choose Closet Wallpaper
A closet is usually a low-light, high-contact space, so closet wallpaper should be chosen with scale, light reflection, and durability in mind. The most noticeable result often comes from one well-placed surface, not from covering every panel.
In practice, wallpaper for closet upgrades works best when it highlights the back wall, a niche, or a shelving bay that is visible as soon as the doors open.
Where Wallpaper in Closets Looks Best
-
Back wall behind hanging rails: Adds depth while keeping clothing in the foreground.
-
Shelf bays and cubbies: Gives open storage more structure and makes folded stacks look tidier.
-
Reach-in closets: Use wallpaper in closet areas as one feature zone, then keep the surrounding surfaces plain.
-
Linen or storage closets: Calmer prints help reduce visual clutter.
Pattern and Color Rules That Work in a Closet
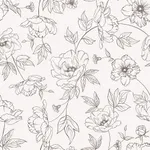
Lighter backgrounds reduce shadows and make a small closet feel less boxed in. If the shelving is dark wood or black, choose a lighter print with clear shapes to keep the contrast balanced. If your hardware is brass, black, or chrome, repeat that tone once in the pattern so the wallpapered closet feels intentional and coordinated.
Durability Notes Before You Choose Wallpaper Inside Closet Areas
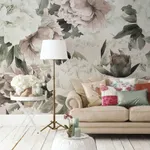
Closets often get scuffed by hangers, bins, shoes, and storage baskets, so avoid fragile finishes in high-contact spots. If you have sliding doors, skip heavy textures near tracks and edges where the panels may rub. For everyday use, a wipeable surface is usually the safest choice for wallpaper inside closet areas. If you want artwork-scale graphics, place them higher on the wall or on the back panel where friction is minimal. If you use closet murals, treat them as a single statement surface and keep nearby patterns simple.
Frequently Asked Questions
Use medium scale on small doors, larger motifs on open back walls. Light grounds help in low light. Geometric patterns read cleanly and match tones to shelving and hardware.
Nonwoven vinyl is wipeable for shoes and dust. Peel and stick fits rentals on smooth paint. Avoid plain paper near humid zones – consider laundry room wallpaper for adjacent spaces.
Measure each section separately. Note the width and height in three spots, keep the largest, then add 5-10 cm per edge for trimming around shelves.
Degrease, fill, and sand, then prime smooth. Remove shelves and hardware. Measure each section and cut with 5-10 cm extra. Start plumb, smooth panel by panel, wrap edges slightly, trim with a sharp blade. Refit parts and wait 24 hours before wiping.